

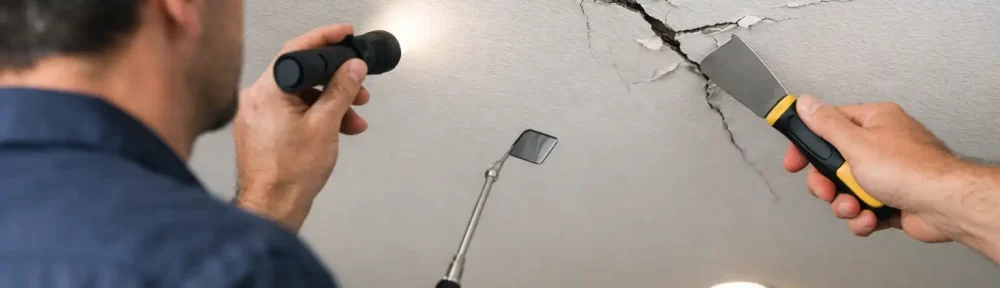
A ceiling crack that has been filled, painted and then reappears in the same place is not simply a decorating nuisance. Knowing how to investigate recurring ceiling cracks helps you establish whether you are seeing minor plaster movement, water-related damage, defective workmanship or a developing structural concern. The pattern, location and behaviour of the crack matter far more than the fact that it exists.
Recurring cracks deserve a measured response. Most are not evidence of imminent collapse, particularly in older homes where materials move seasonally. However, covering the crack without identifying the cause can allow a roof leak, failed ceiling fixing or ongoing building movement to become more expensive to repair.
Start by making the area safe
Before inspecting closely, look for signs that the ceiling may be unstable. A visibly bowed or sagging ceiling, loose plaster, a damp patch that is increasing, or cracking accompanied by a creaking sound requires prompt attention. Keep people away from the affected room where there is a risk of falling material, especially beneath a bathroom, water tank, flat roof or roof valley.
Do not press a sagging ceiling upwards or cut into it to investigate. Water can collect above plasterboard and lath-and-plaster ceilings, adding significant weight before the surface fails. If there is active water ingress, isolate the water supply where appropriate and arrange urgent investigation of the roof, plumbing or bathroom installation.
Take additional care in properties built or refurbished before 2000. Textured coatings, ceiling boards and some associated materials may contain asbestos. Sampling and disturbance should be handled through the proper asbestos survey process rather than drilling or scraping an unknown coating.
Record the crack before repairing it
A useful investigation begins with evidence. Photograph the crack in good natural or artificial light, including a wider image that shows its position in the room. Place a ruler or tape measure beside it for scale, then date the images. Repeat this at intervals, and always after heavy rainfall, cold weather, a period of dry weather or major works nearby.
Record the following observations in a simple property maintenance log:
- the crack’s length, approximate width and whether it is open, stepped, raised or only visible through paint;
- its exact location, including whether it follows a plasterboard joint, ceiling edge, beam line, chimney breast or loft hatch;
- staining, peeling paint, mould, softness or a change in ceiling level around it;
- the rooms or external building elements directly above and adjacent to the affected area; and
- any recent changes, such as loft boarding, a new bathroom, roof repairs, internal wall removal, heating alterations or nearby excavation.
This record allows you to distinguish a crack that is genuinely recurring from one that was not properly prepared before the last repair. It also gives a surveyor clear evidence of movement over time, rather than relying on memory after a fresh coat of paint has obscured the detail.
How to investigate recurring ceiling cracks by location
Location is often the quickest route to the likely cause. A straight, fine crack running along the line of a plasterboard joint may indicate joint tape failure, insufficient fixing, thermal movement or normal deflection in the structure above. This is usually less concerning than a widening crack that crosses boards, changes direction or is accompanied by sagging.
Cracks at the junction between a ceiling and wall are common where timber joists, plaster and masonry move at different rates. They may appear after changes in humidity, central heating use or minor settlement. If the crack opens and closes slightly but there is no distortion, dampness or related cracking in walls, cosmetic repair may be reasonable once monitored.
A crack beneath a bathroom, shower room or plumbing route should be treated as a potential leak until proven otherwise. Check for brown staining, a soft finish, bubbling paint and musty odours. A slow leak from a shower tray, waste pipe, toilet connection or failed seal can wet the ceiling void for weeks before obvious dripping occurs. Repairing the ceiling first will only conceal the symptom.
Cracking beneath the roof space needs a wider check. Look in the loft, where safe access is available, for staining on insulation, water marks on timbers, daylight around roof penetrations and signs of condensation. Assess whether the ceiling joists have been overloaded by stored possessions, boarding, tanks or altered access routes. Loft boarding should be supported correctly and should not compress insulation or impose unintended loads on ceiling members.
Where a crack runs close to a chimney breast, roof valley, external wall or ceiling below a flat roof, inspect the exterior and roof covering as part of the diagnosis. Defective flashing, slipped tiles, worn membranes and blocked gutters can all direct water into a localised area. The visible ceiling crack may be some distance from the entry point, as moisture can travel along timbers and services before it appears internally.
Separate moisture damage from movement
Moisture and movement can produce similar-looking cracks, but their supporting signs differ. Moisture damage often brings discolouration, mould, bubbling, flaking paint, a soft surface or a distinct damp smell. The defect may worsen after rain or after using a shower. A moisture meter can support an inspection, but readings need interpreting carefully because salts, foil-backed materials and surface conditions can affect results.
Movement-related cracking is more likely to be clean and dry, particularly where it follows a joint or changes at the wall-ceiling junction. Look beyond the ceiling. Are there cracks in the walls below, doors that have started sticking, gaps at skirting boards, sloping floors or distortion around window openings? One isolated hairline crack is different from a pattern of defects across several rooms.
Seasonal movement in timber-framed elements, traditional plaster and older buildings is common. Recent refurbishment can also create movement as new materials dry out or as altered loads settle. That does not mean the issue should be dismissed. The practical question is whether the crack is stable, whether it is widening and whether there is evidence of a defect affecting the building’s weatherproofing or structure.
Check the repair history and changes above
A recurrence in exactly the same line frequently points to an ineffective previous repair. For plasterboard, filling over an opening joint without securing loose boards or renewing failed tape is unlikely to last. For traditional lath-and-plaster, repeated cracking can indicate loss of the plaster’s key, weakened fixings or deflection in the supporting structure.
Ask when the crack was first noticed and what happened immediately beforehand. A new loft conversion, bathroom replacement, roof work, water leak, installation of heavy storage, removal of an internal wall or nearby construction activity may be relevant. In flats, the source may be in the property above or within shared services, so prompt communication with the managing agent, freeholder or upstairs occupier can prevent avoidable delay.
Avoid treating a crack monitor as a substitute for investigation. A simple dated pencil mark or purpose-made monitor can help show whether movement is active, but it cannot identify why the movement is occurring. It is most useful after a visual inspection has established that there is no immediate risk.
When recurring ceiling cracks need a professional survey
Arrange a professional inspection promptly if a crack is widening, longer than a localised joint crack, repeatedly reopening after proper repair, or accompanied by dampness, sagging or wall cracking. The same applies where the ceiling sits below a roof defect, bathroom leak, altered structural opening, chimney breast or suspected overloaded loft area.
A qualified building surveyor or building engineer can assess the ceiling finish, structure above, roof and associated defects as one system. Depending on the findings, the inspection may include roof-space assessment, moisture investigation, thermal imaging or recommendations for further structural assessment. The objective is not merely to label a crack, but to identify the cause, likely repair scope and appropriate urgency.
For buyers, landlords and homeowners planning significant works, an independent report can also provide evidence for price negotiations, insurance discussions, contractor scopes or construction dispute resolution. HICH LTD’s building diagnostics approach focuses on the defect’s cause and repair implications, helping clients make decisions before unnecessary cosmetic work is commissioned.
Repair only after the cause is controlled
Once water ingress, movement, failed fixings or workmanship issues have been addressed, allow affected materials to dry and stabilise before redecorating. The suitable repair depends on the ceiling type and cause. A stable plasterboard joint may need refixing, retaping and filling, while loose or water-damaged plasterboard may require replacement. Traditional ceilings can need specialist repair to preserve sound material without creating an incompatible patch.
The most useful outcome is a clear record of what changed, what caused it and whether the crack has stopped progressing. A ceiling is often the first surface to reveal a defect above it. Treat that signal seriously, investigate methodically and you will be far better placed to protect the building and control repair costs.